Add-->
Categories: 12-04-2009-->
 Today is Easter Sunday, and like we all know Easter Eggs and Easter Bunny is what first comes to our mind. In this tutorial, we’ll be making a Cute Easter Bunny using just the basic shapes and a variety of simple tools, making it a good start for Illustrator beginners. We’ll also be using some basic gradients, color tools and the Pathfinder with a step by step instructions.
Try to create a Easter Bunny now using this tutorial and send it to your friends and relatives!
Final Image Preview
Below is the final image we will be working towards in this character creation tutorial targeted at the beginner to intermediate Illustrator user.

After opening up Adobe Illustrator, create a new document. For this project the size of the document doesn’t matter at all, Illustrator has a vast area of artboard beyond the document edges that can be used.
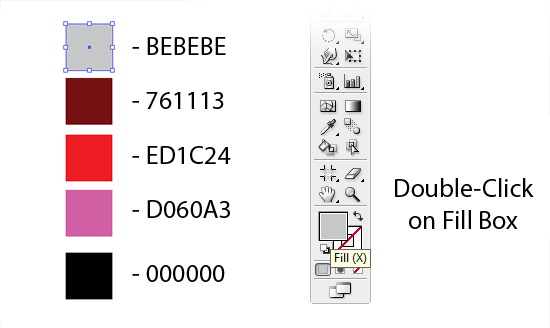
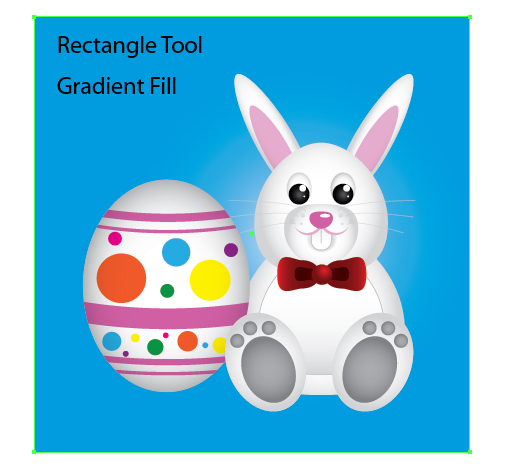
First, Lets create some Rectangles for the colors we will use. Using the Rectangle Tool (M) create the rectangles and Edit the Fill by double-clicking the box and filling in the hex value or # in Color Picker.
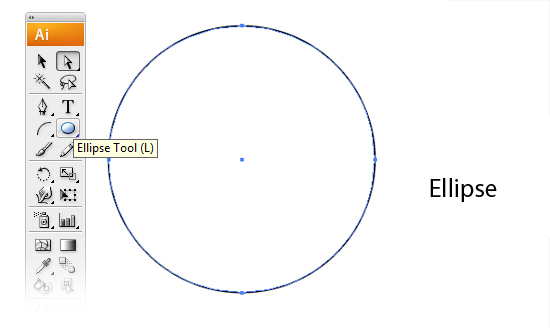
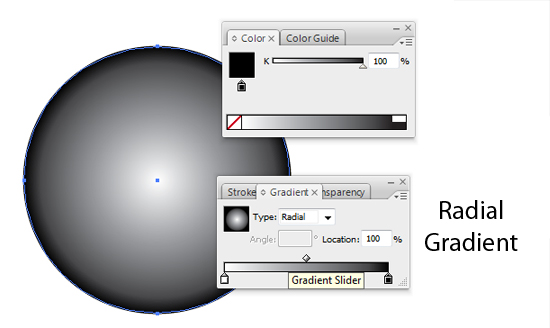
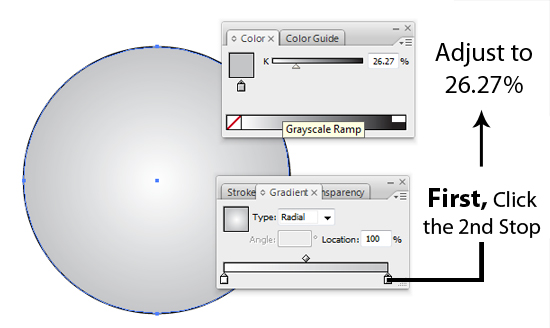
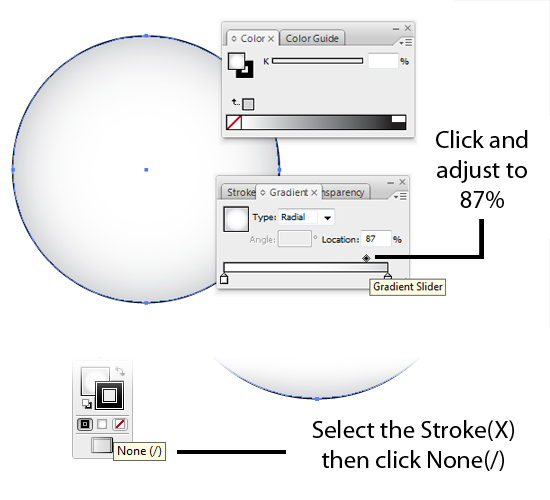
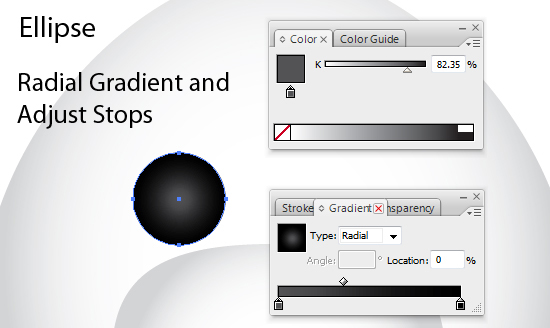
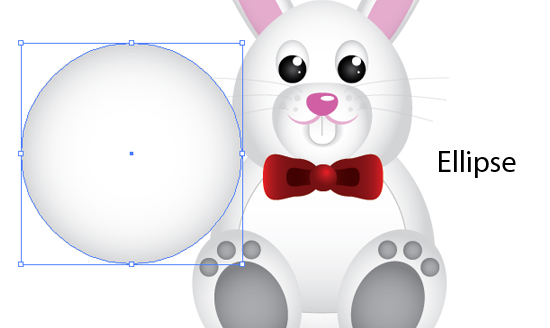
Create an ellipse with the Ellipse tool (L). With the ellipse selected, create a radial gradient from the gradient panel. Make the first Color Stop in the radial gradient white and the second Color Stop by holding Shift and using the Eyedropper Tool(I) select the Color with a Hex Value of #BEBEBE. Within the gradient panel, click on the Midpoint Indicator on the Gradient Slider and move it right, adjust to 87%. Remove the Stroke if there is by Clicking the None(/) on the toolbar below it.
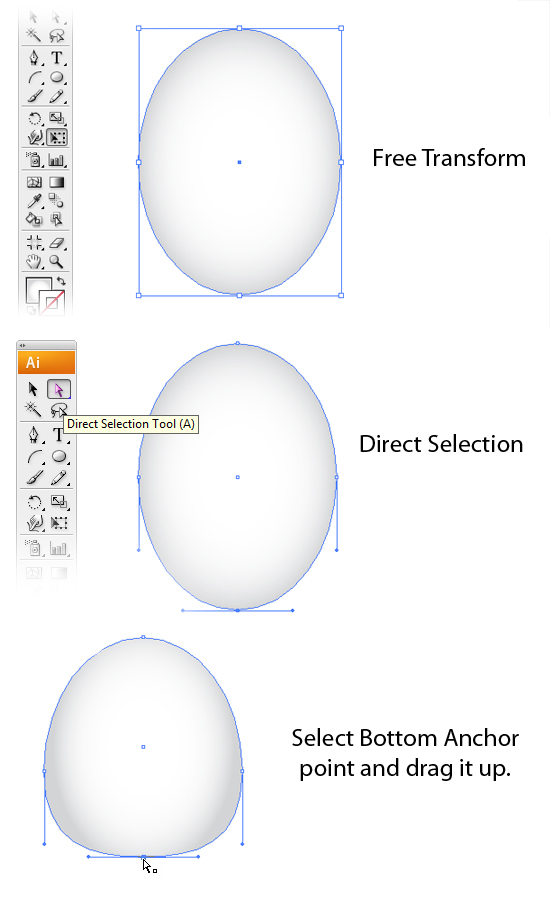
Next, with the Direct Selection tool (A), select the bottom anchor point of the ellipse and drag it up about one fourth the way up the ellipse.
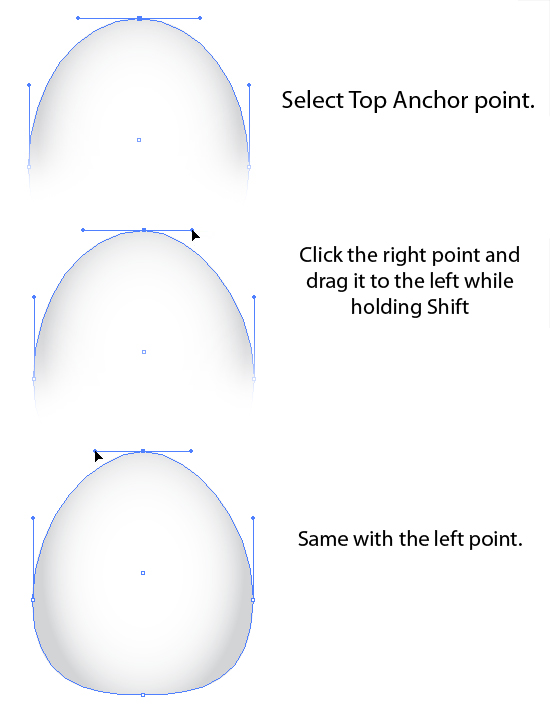
Select Top Anchor Point. Click the Right Point and Drag it to the right while holding Shift. Same goes with the Left Point.
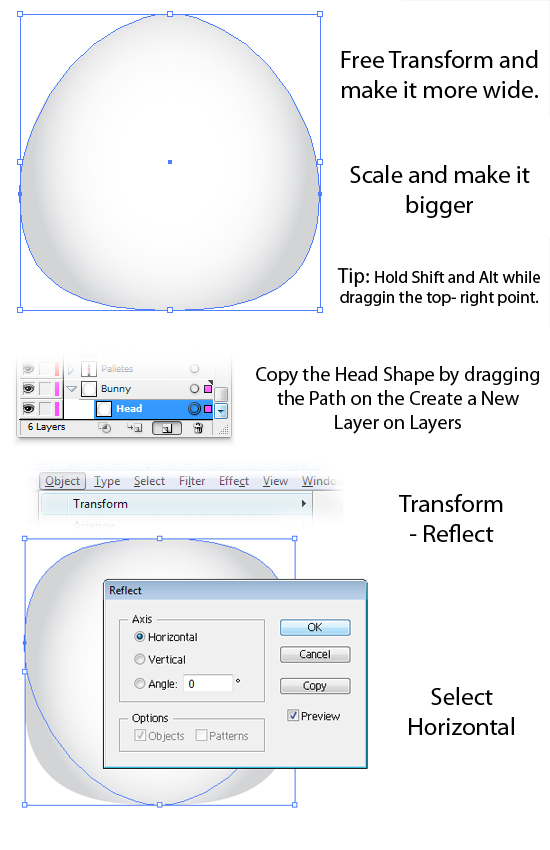
With the Path Selected, Free Transform it and make it more wider. Hold Shift + Alt while dragging the corners to scale it from the center. Copy the shape again by dragging the Path on the Create a New Layer on the Layers Tab. Making a duplicate path. On the Menu Bar, Click on Object > Transform > Reflect. Then on the Reflect Settings, select Horizontal.
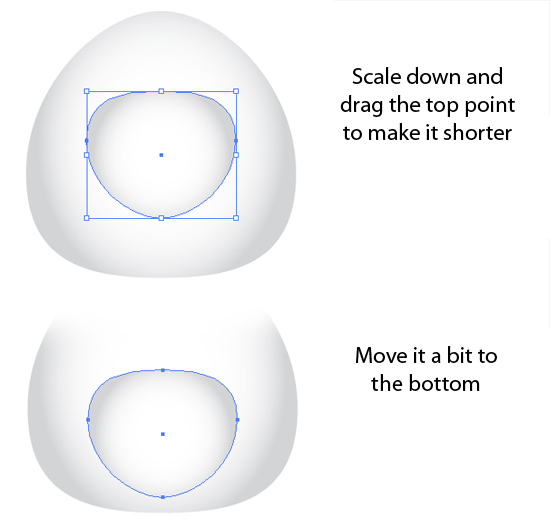
Scale it down and make it more shorter and flat by dragging the Top Point down. Move it to the bottom.
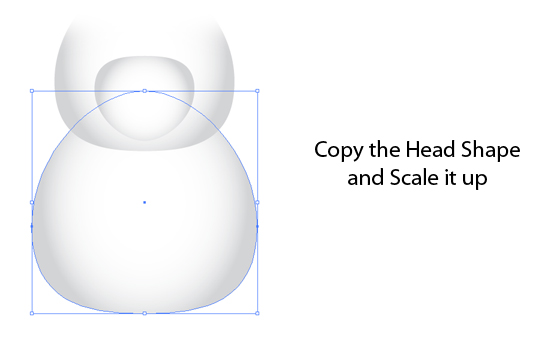
Copy the Head Shape and make it more bigger by using the Free Transform Tool.
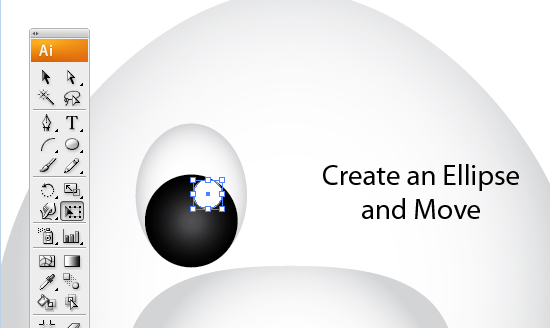
Create an Ellipse for the Eyes and add a Radial Gradient.
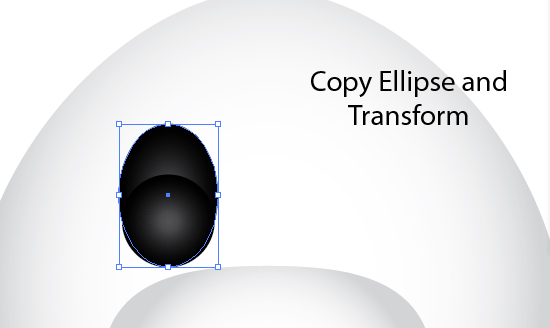
Copy and Paste it at the back of the Path. Free Transform and make it wider. Use the Eyedropper Tool and point it on the Head Shape.

Create another Ellipse with White Fill and move it. Then Create another Smaller Ellipse.
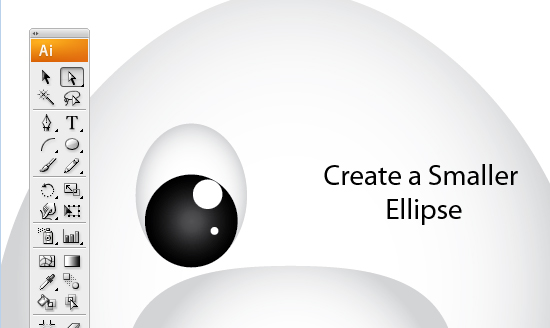
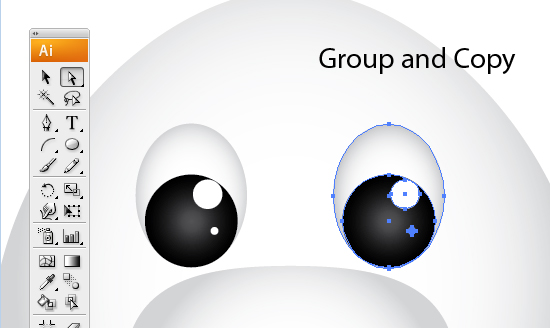
Select the Paths for the Eyes.
Copy and Paste the Head Shape. Free Transform and make it more Narrow. Rotate Counter-Clockwise. Send the Path at Back under the Layers Tab. Copy and Paste the Path and Free-Transform and Scale it down.
Use the Eyedropper Tool and Pick the Pink Pallete(#D060A3) we made on the First Step.
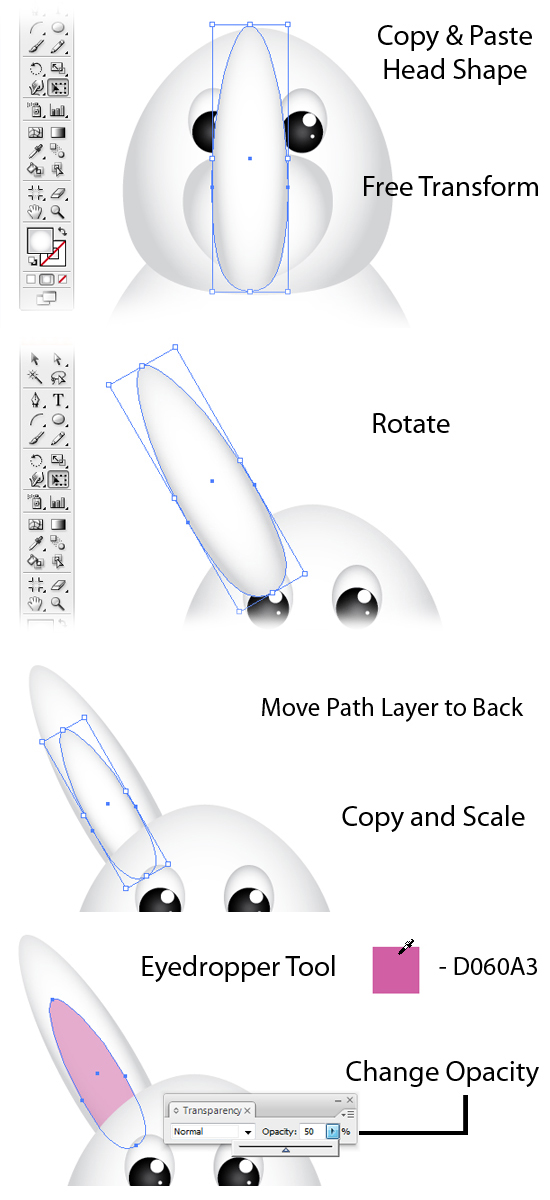
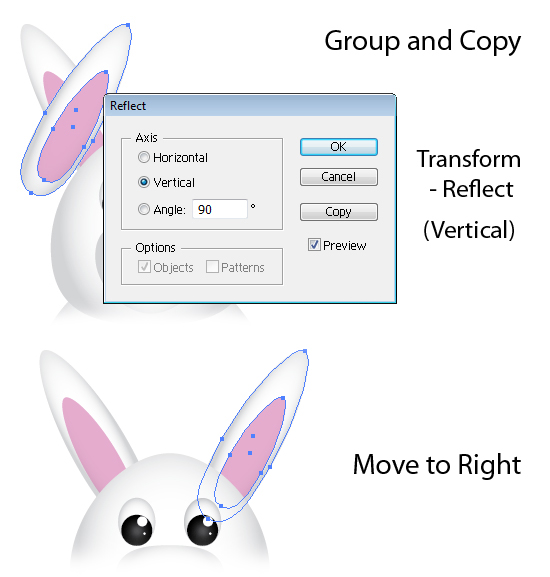
Select the Paths that made up the Ears.Group them and make a copy. Transform > Reflect and select the Vertical. Then move it to right side to make the Right Ear.
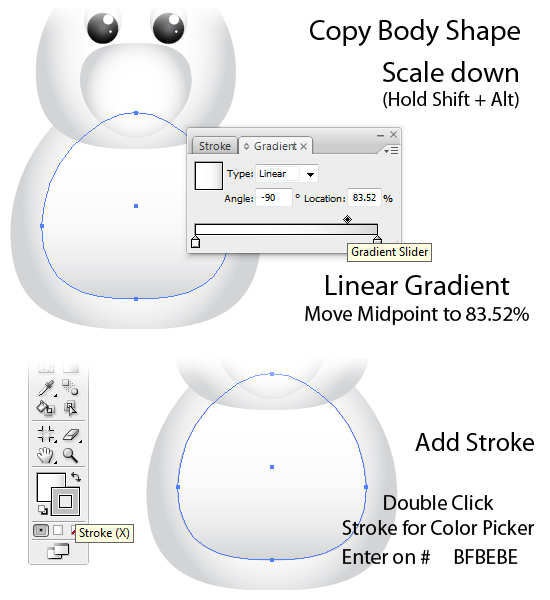
Select the Body Shape Path and make a Copy. Scale it down and make the Radial Gradient to Linear Gradient. Move the midpoint to 83.52%. Add a Stroke and Enter the #BEBEBE on Color Picker.
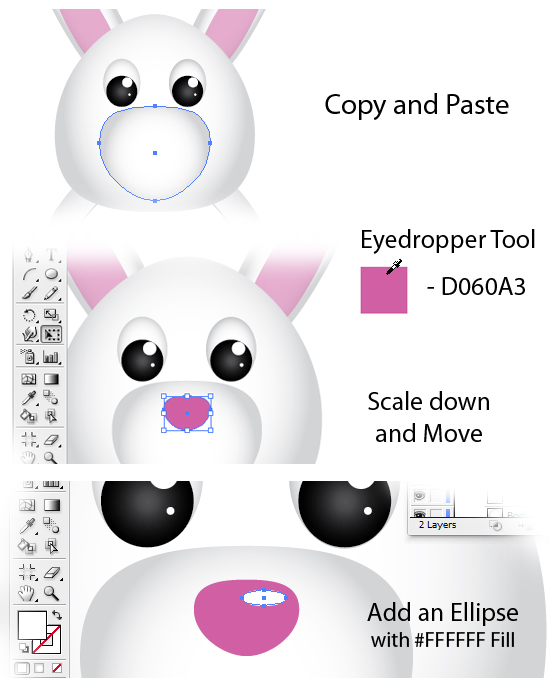
Copy the Nose-Body and Free-Transform. Use the Eyedropper Tool and pick the Pink Pallete. Scale it down and try making it more flat. Add an Ellipse with White Fill.
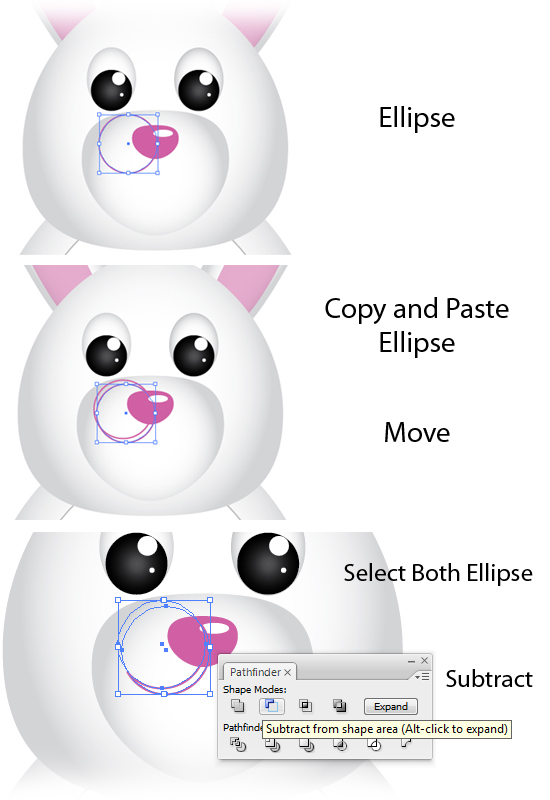
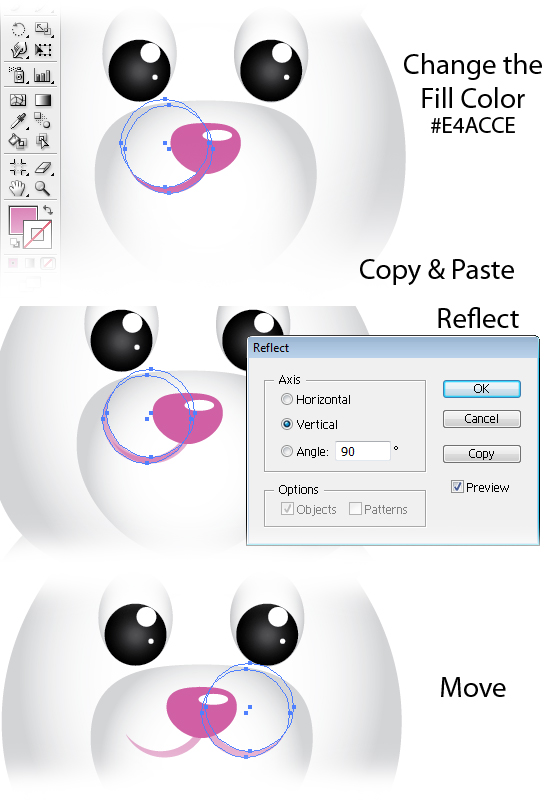
Create an Ellipse and make another Copy. Move it a little to the Right. Select Both and use the Pathfinder. Subtract it from shape Area.
Change the Fill Color to #E4ACCE. Make a copy and Transform > Reflect. Select Vertical. Move it to the Right.
For the Teeth, Using the Round Rectangle Tool. Place it on the center of the Nose.
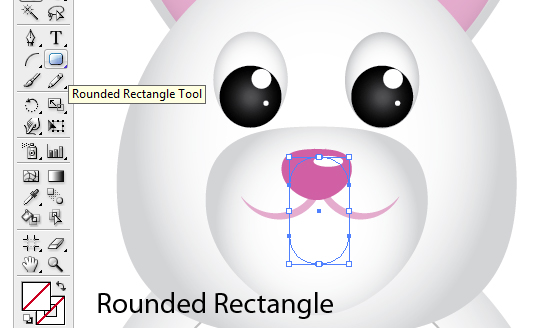
Use the Eyedropper Tool and Pick on the Head Shape. Add a stroke of Grey and change it to Linear Gradient. Move midpoint to 57.69%.

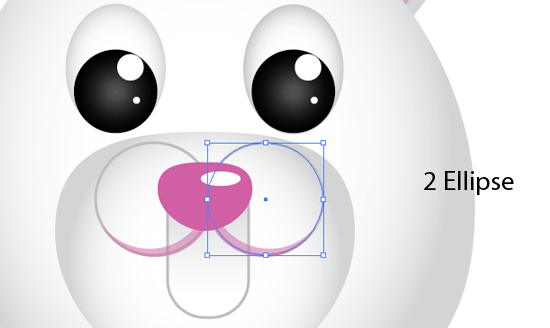
Create 2 Ellipses.
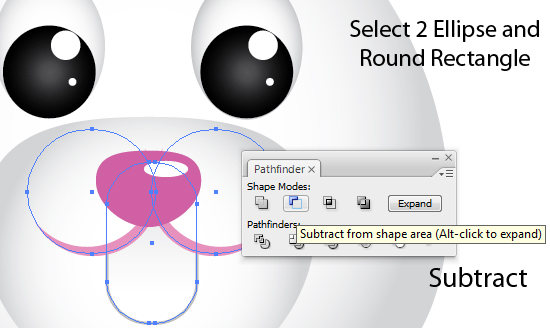
Select the 2 Ellipses and the Round Rectangle. Make sure the Round Rectangle is on the bottom of the 2 Ellipse on the Layers. Use the Path Finder and Subtract.
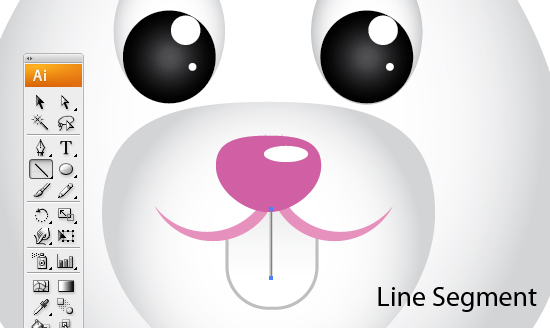
Add a Line using the Line Segment Tool on the Middle of the Teeth. With a Stroke of Grey.
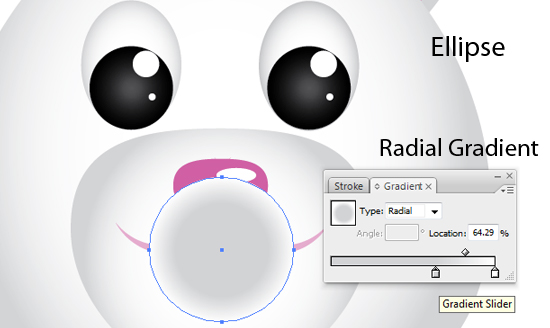
Creat an Ellipse and Add a Radial Gradient. Make the 2nd stop White while the 1st stop a Grey. Adjust Midpoint to 64.29%.
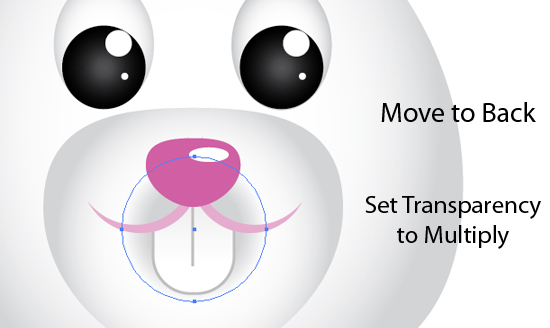
Move it to Back and Set Transparency to Multiply.
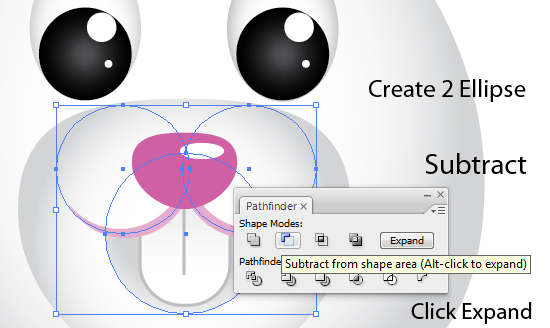
Create 2 Ellipse and try to imitate the Arc on the Mouth Line. On the Pathfinder, Subtract and Expand.
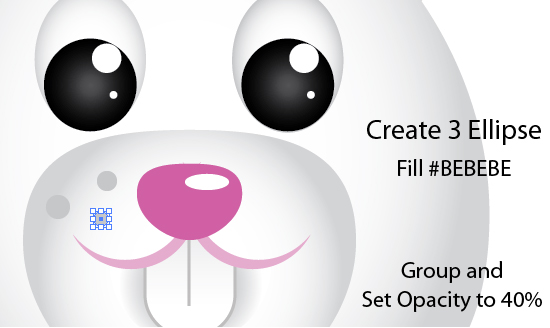
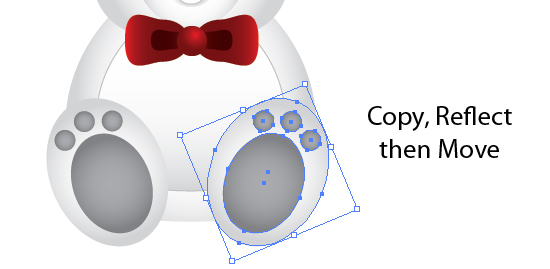
Create 3 Small Elipse with Grey(BEBEBE) Fill. Group them and set opacity to 40%.
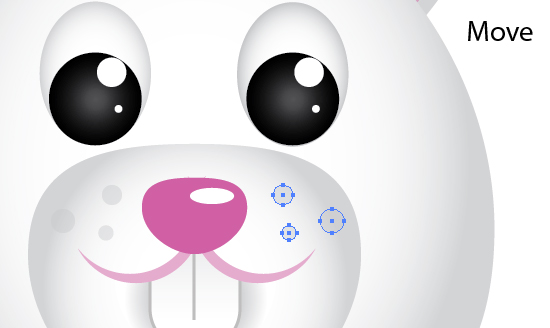
Copy and Transform > Reflect. Select Vertical.

Move it to the Right Cheek.
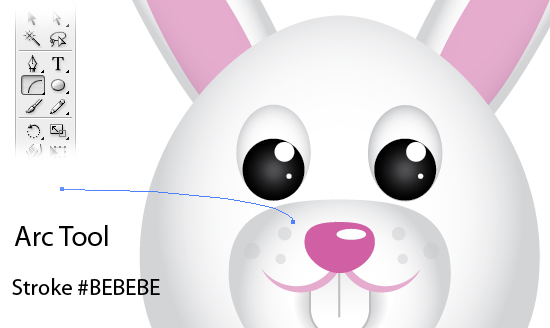
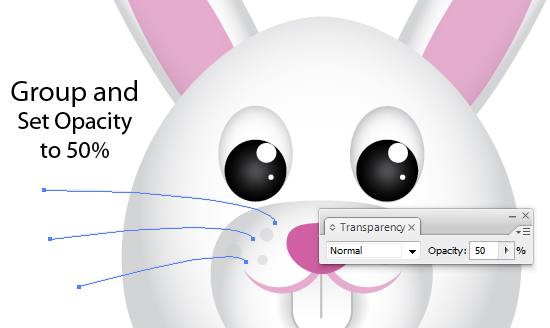
Using the Arc Tool. Create an Arc for the Whiskers. Make the stroke with a Grey(#BEBEBE) color.
Create 3 more by Copying and Free-Transform and Scaling. Group and Set Opacity to 50%.
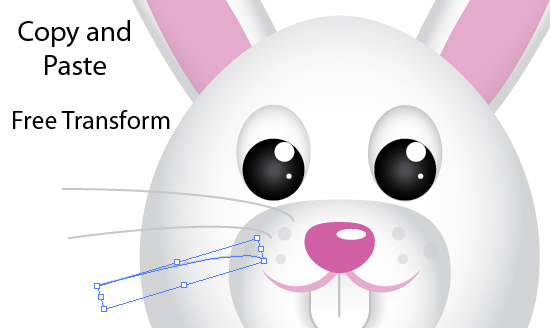
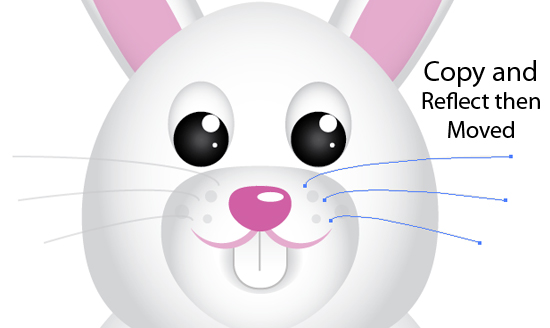
Copy and Reflect Vertically them move to right.
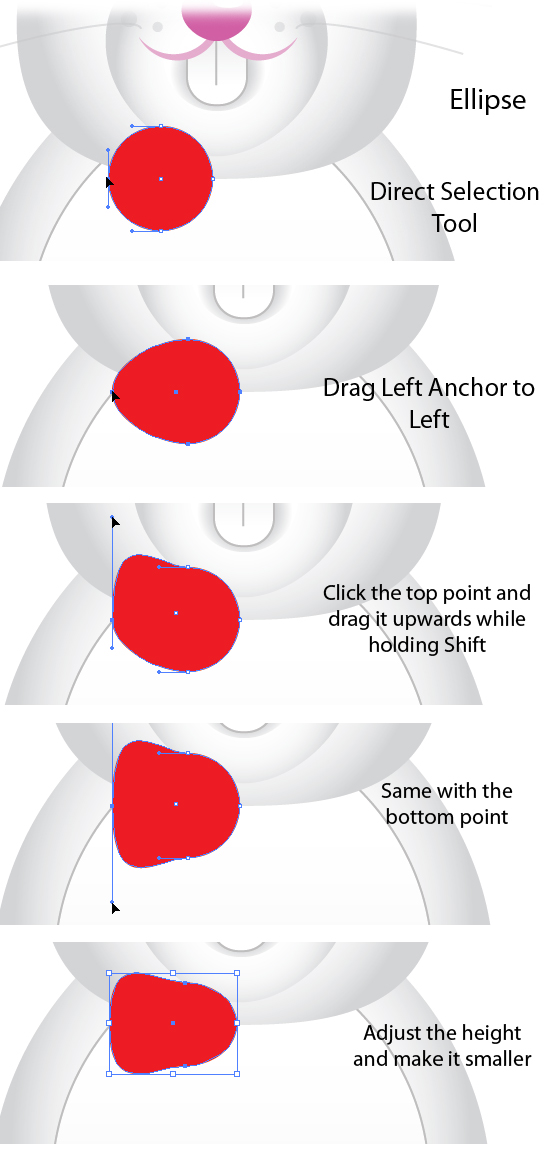
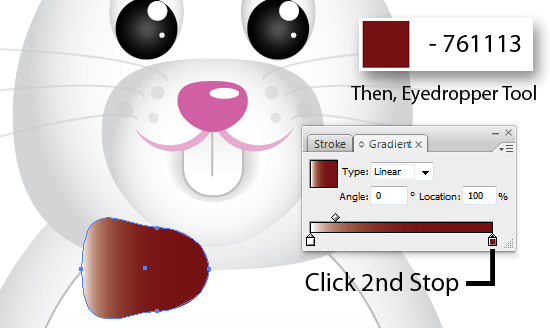
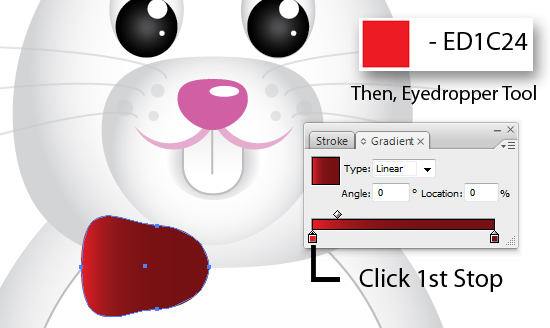
Create an Ellipse with Red Fill. Using the Direct Selection Tool. Drag Left Anchor to Left. Click top Point and drag it upwards while holding Shift. Same with the bottom point. Adjust Height and make it smaller.
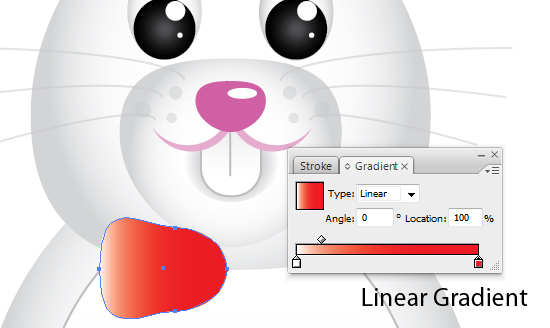
Add a Linear Gradient. Click 2nd Stop, Hold shift and Select the Dark Red from our palletes. Then the 1st Stop, Hold shift and Select the Red Color.
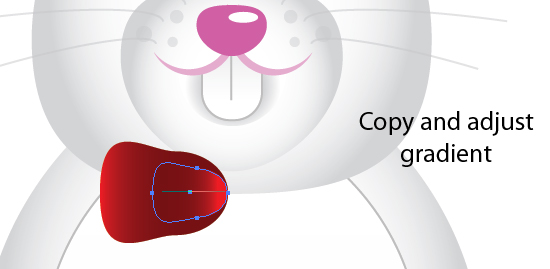
Copy and Scale Down. Using the Gradient Tool, drag from right to left.
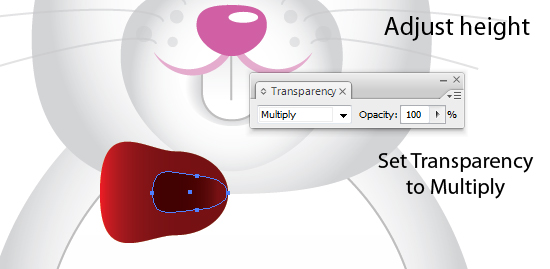
Adjust Height and Set Opacity to Multiply.
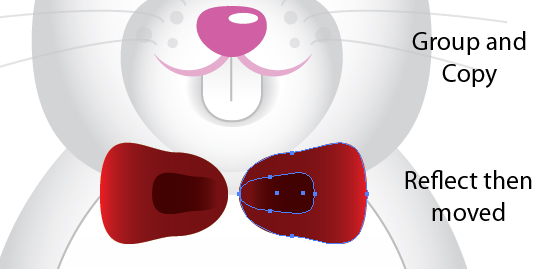
Group them and make a copy. Transform > Reflect then move it to the right.
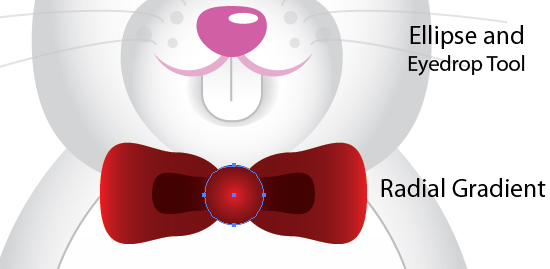
Create an Ellipse, Use the Eyedropper and pick on the Ribbon’s Gradient. Set it to Radial Gradient. Using Gradient Tool, drag from middle top right to bottom left.

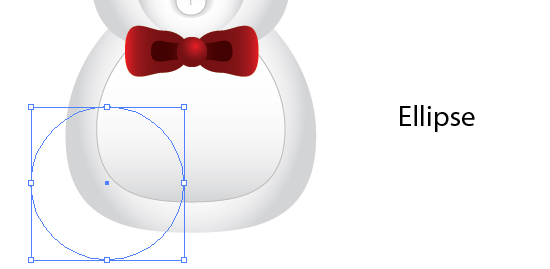
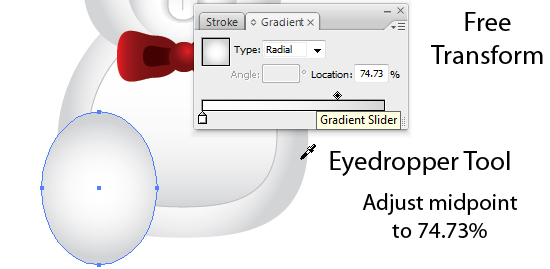
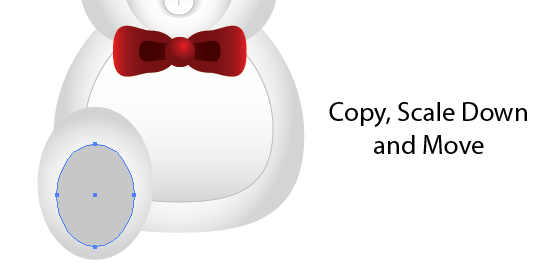
Create an Ellise. Free Transform and using the eyedropper again select on the Body’s Gradient. Adjust midpoint to 74.73%.
Create a copy, scale it down and move a bit to the bottom.
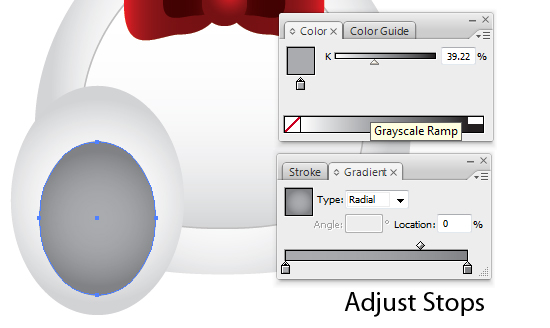
Click on the 2nd Stop and Adjust the Color on the Color Tabs or set it to 39.22%.
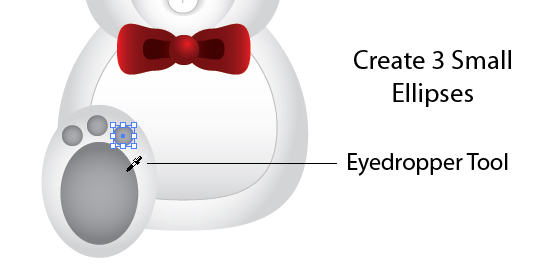
Create 3 Small Elipses and Pick on the Gradient of the Big Ellipse with the Eyedropper.
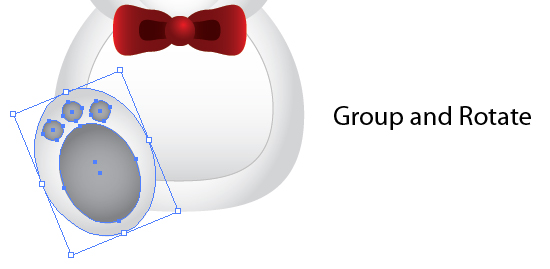
Group them and Rotate Counter-Clockwise. Make a copy and Transform > Reflect and move to the right.
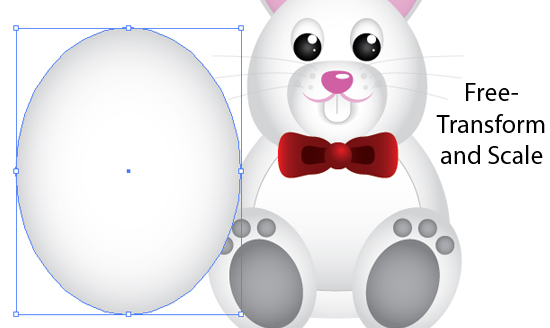
For the Egg, Create an Ellipse. Free-Tranform and make it Narrower. Scale it up to make it bigger.
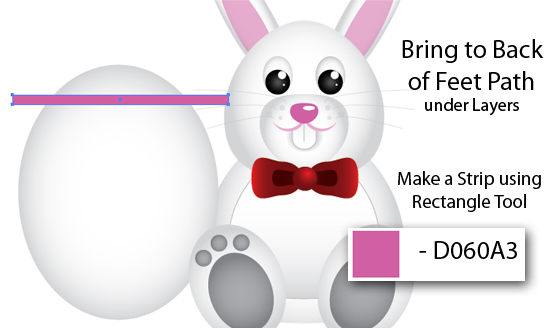
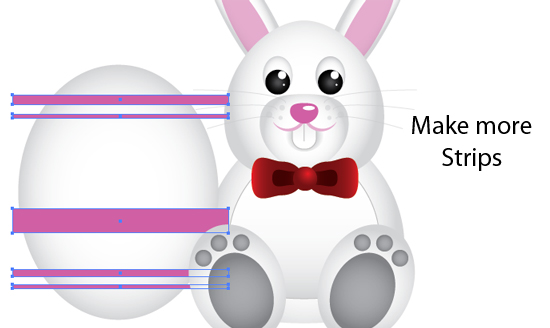
Bring it to back of Feet Path under Layers Tab. Make a strip using the Rectangle Tool. Pick on the Pink Pallete.
Make more Strips and make your own design.
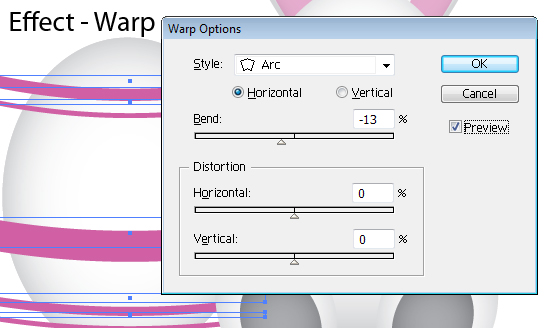
On the menu, Click on the Effect > Warp. Set options to settings below.
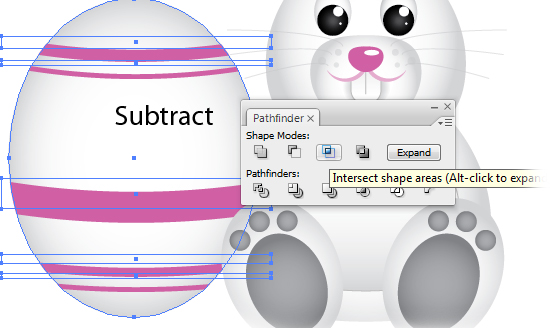
Create a copy of the Egg Shape. Select the New shape and the Strips. Make sure the egg shape is at the back of the Strips on Layers tab. On the Pathfinder, Subtact from shape area.
Create Ellipses and go wild with your design and use different Fill Colors.
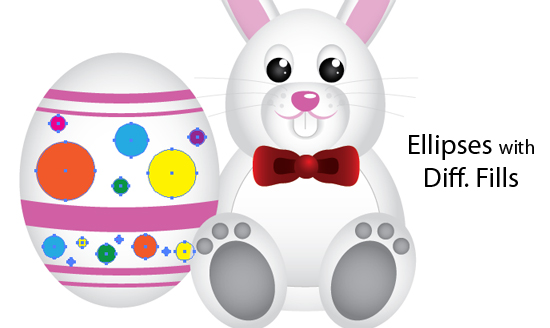
Create a copy of the Egg Shape and Bring it to Front. Set the Transparency to Multiply.

Using the Rectangle Tool, Create a Box to bound our Illustration. Add a Radial Gradient Fill with a lighter blue and blue Fills. Send it to bottom or back of the Layers under Layers Tab.
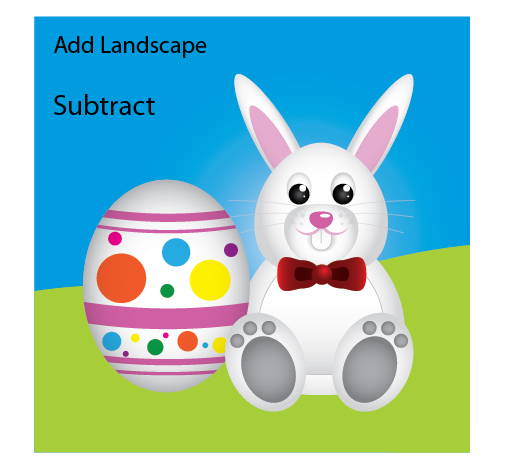
Add a Landscape or some hills. with a Light Green Fill. Dont worry about making excess of the bounding box. Create a copy of the Box and Select the Landscape. On the Pathfinder, click on the Subtract from Shape Area.
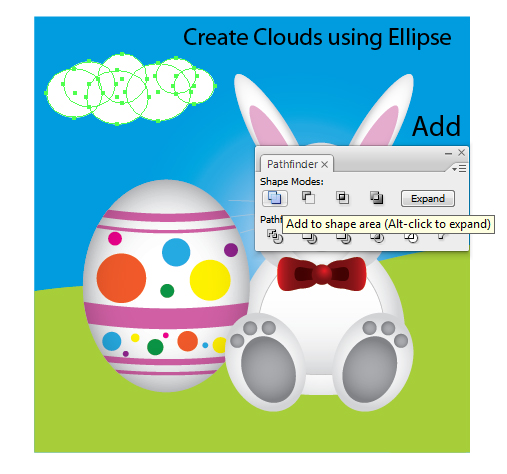
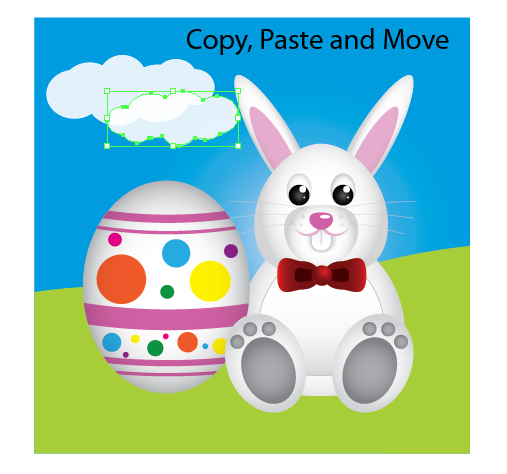
Create Clouds using Ellipses. On the Pathfinder, click on the Add from Shape Area.
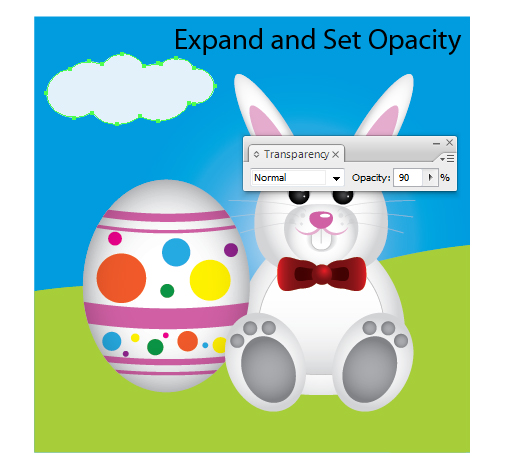
Click Expand and Set Opacity to 90%.
Create a copy, Scale it down and Move it to the bottom right.
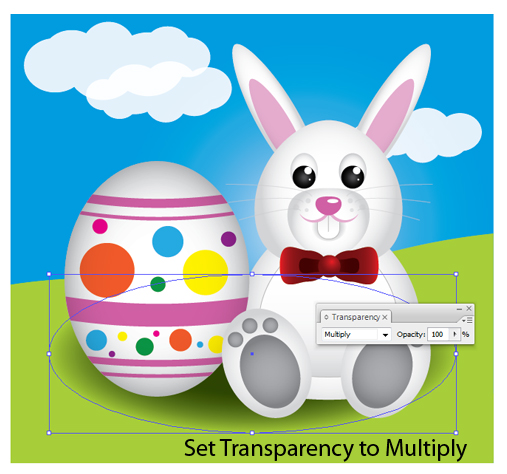
Create an Ellipse and add a Radial Gradient just like below. Use the 1st stop and adjust in colors to something darker grey.
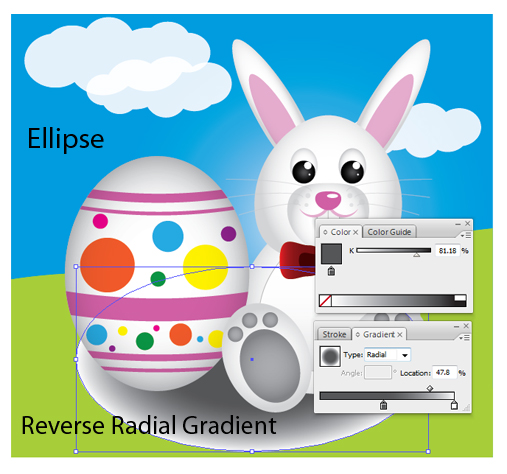
Set the Transparency to Multiply.
Final Image Preview
We’re Done! That was easy wasn’t it? Below is the Final Image I obtained. Enjoy and Happy Easter!
Join 1Y0-A17 web designing course to become expert of this art. Download PMI-001 tutorials and 70-646 demos to learn best web design practices.

We Recommend
- - Printing Needs? We know great guys on Business Printing Services.
Create a Cute Easter Bunny Vector : Design Newz Says:
Hot News » Where Is The Easter Bunny Right Now Says:
50+ Promising Collection Of Resources And Inspirations For Designers To Discover The Best Of The Web In April @ SmashingApps Says:
FreeDownloadSecrets.com » Blog Archive » 50+ Promising Collection Of Resources And Inspirations For Designers To Discover The Best Of The Web In April Says:
10 Amazing Illustrator Tutorials | Gulali Blog Says:
Best of the Web - April 2009 « Internet Turnkey Websites Says:
10 Amazing Illustrator Tutorials « Powerusers Says:
Varhoken Says:
Custom Printed Boxes. But this is great!
Testking EX0-101 | Testking 646-364
Create a Cute Easter Bunny Vector”
Create a Cute Easter Bunny Vector : Design Newz Says:
Hot News » Where Is The Easter Bunny Right Now Says:
50+ Promising Collection Of Resources And Inspirations For Designers To Discover The Best Of The Web In April @ SmashingApps Says:
FreeDownloadSecrets.com » Blog Archive » 50+ Promising Collection Of Resources And Inspirations For Designers To Discover The Best Of The Web In April Says:
10 Amazing Illustrator Tutorials | Gulali Blog Says:
Best of the Web - April 2009 « Internet Turnkey Websites Says:
10 Amazing Illustrator Tutorials « Powerusers Says:
Varhoken Says:
Custom Printed Boxes. But this is great!
Testking EX0-101 | Testking 646-364
Popular Threads